IR Sensor
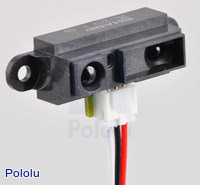
The infrared distance sensor is necessary to complete the wall challenge. This particular sensor is the GP2Y0A21YK0F model.
How it Works
IR distance sensors emit bursts of infrared light towards a surface. The light bounces off objects it hits, and then enters a proximity sensor. The output is then transformed into a voltage (see graph below) that can be read by the ESP32’s ADC. See this link for more information.
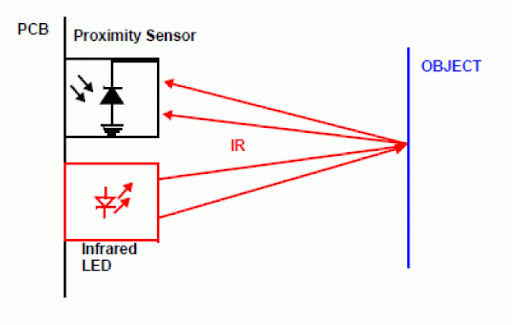
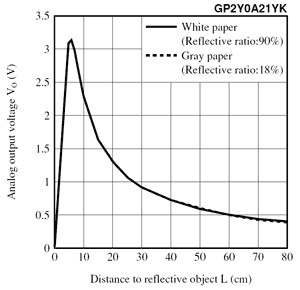
Notice that the sensor will output garbage if the sensor is too close to an object.
Interfacing
There are 3 pins (red, black, white) to the device as seen in the picture, associated to Power, Ground, and Output Signal, respectively. For testing the distance sensor, let’s use pin 12, as the signal pin. Hook up the circuit as follows:
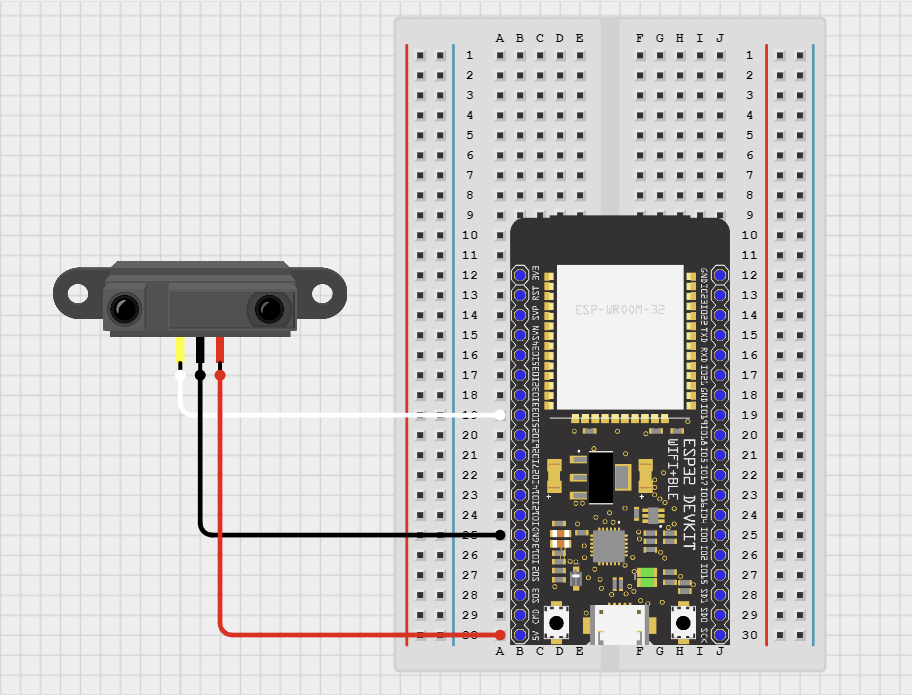
| IR Sensor Pin | ESP32 Pin |
|---|---|
| VIN | 5V |
| GND | GND |
| Signal | Any ADC Capable Pin |
If you’re not sure about the ESP32 pinout, then check out the diagram in this page!
Programming
The following program will allow you to read values from the IR sensor in a loop. After you build and flash the program, you should see the values in your terminal change as you move it towards and away from an object.
#include "sdkconfig.h"
#include <Arduino.h>

#include <ESP32SharpIR.h>

ESP32SharpIR IRSensorName(ESP32SharpIR::GP2Y0A21YK0F, 12);

void setup() {
    Serial.begin(115200);
    IRSensorName.setFilterRate(1.0f);
}

void loop() {
    Console.println(IRSensorName.getDistanceFloat());
    delay(100);
}