How to use Git:
What is Git?
Git is a tool used for source/version control, which is the process of tracking changes to files over time.
It allows you to:
- Easily share code or other files (not necessarily code, such as KiCad project files) with teammates
- Keep a history of your project
- Revert to previous versions if needed
- Work on new ideas or features without affecting the main project
A repository (or repo) is where all your files and their history are stored. Repositories can be stored locally on your computer or in a cloud service like GitHub or GitLab.
Git is especially helpful for team projects because it tracks who made what changes and makes it easier to collaborate without overwriting each other’s work. This ability is indispensable for developing larger projects, especially in industry.
Note that Robotathon aims to give you a basic understanding of how Git/GitHub works. The whole picture is a lot more complicated and can take a bit of effort to learn!
How do I make changes to my repository on GitHub?
- Make changes to your local files
- Navigate to your repo’s root directory in Git Bash (i.e.
RobotathonESP32by default or whatever you named your repository) - Run
git statusto verify that Git will change what you want it to change (i.e. file actually edited or deleted, file does not belong, etc.) - Run
git add .to stage your changes (What is staging?) - Run
git commit -m "message here"(keep quotes) to commit your change to your local repository (What is the-m?) - Run
git pushto write your commit to the remote repository on GitHub
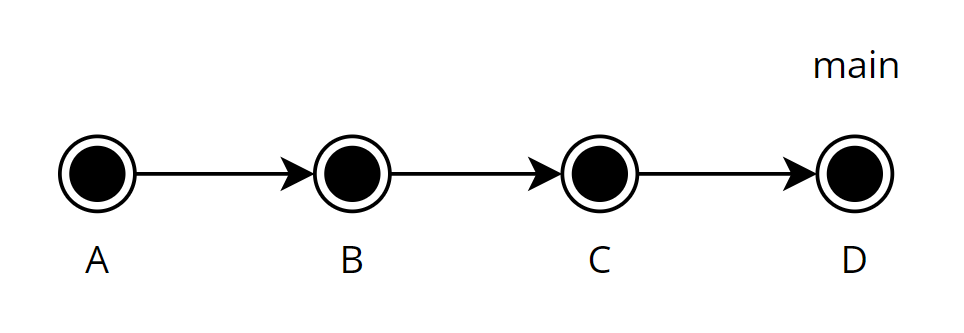
This graph is a Git commit history graph. Each node represents a version of the code with new committed changes (i.e. node B includes the contents of node A along with the newly committed changes).
What is staging in Git?
Instead of having to push every little change to your repository, you can group them into a collection of changes called a commit, which serve as a snapshot of the project’s state. You can collect changes in a file by running git add <file> (or you can use git add . if you want to add all changes across all files).
The staging area in Git is where you can manage your changes before saving them to your commit. You can take a look at what’s going on with git status.
For example, if you accidentally stage a file that you don’t want in your commit (i.e. a build directory), you can simply remove it from the staging area by running git restore --staged <file>.
Once you verify that everything you want to commit is shown in git status, you can proceed to commit the changes to your local repository and then push your local repository to the remote repository on GitHub with git push.
What is a Git clone?
git clone is a command that creates a copy or clone of a repository from a hosting service (i.e. GitHub, GitLab) to your computer’s local storage.
When you clone a repository, you’re downloading all the files, the commit history, and the current state of the project so that you can work on it locally. It’s like taking a snapshot of a project from the remote server and bringing it into your workspace.
Note that a cloned repository does not automatically update to reflect newly pushed commits to GitHub! To update and merge any changes, simply run git pull in your repository’s root directory (i.e. RobotathonESP32)
What is a Git fork?
A repo fork is like making your own personal copy of someone else’s project. When you fork a repository, you’re creating a separate version of it in your GitHub account so that you can make changes without affecting the original project.
You might fork a repo to experiment, add new features, fix bugs, or contribute to an open-source project. It lets you work independently of the original repo while still having access to its code and history.
What is the difference between a Git repo fork and clone?
Forks are copies of a repo on GitHub (remote), while clones are repos stored on your computer (local).
How do I invite my teammates to my forked repository on GitHub?
- Navigate to your repository on GitHub
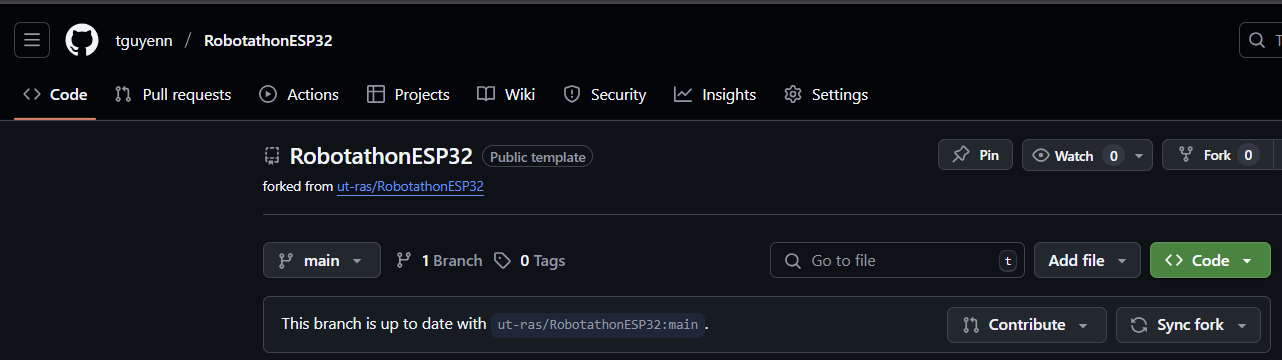
- Click the
Settingstab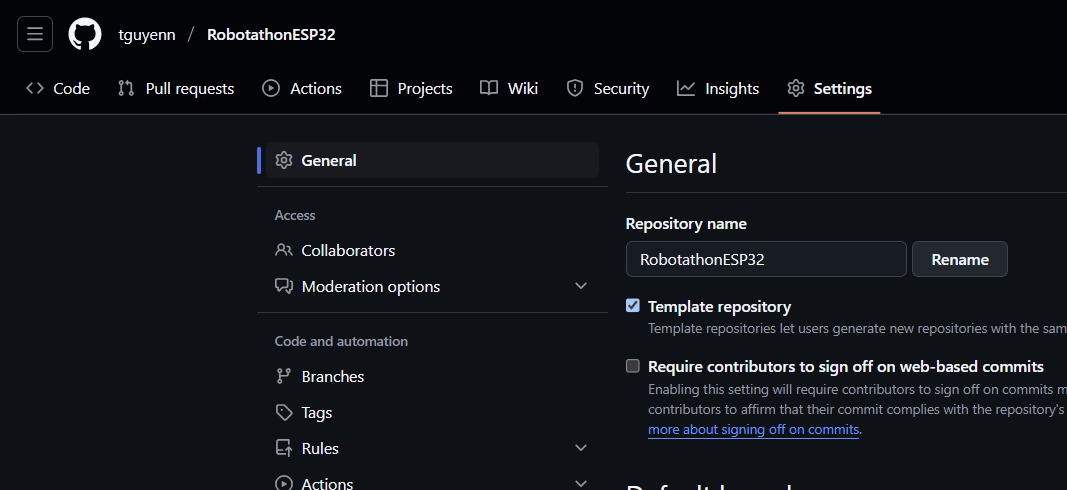
- Click
Collaboratorsin the left menu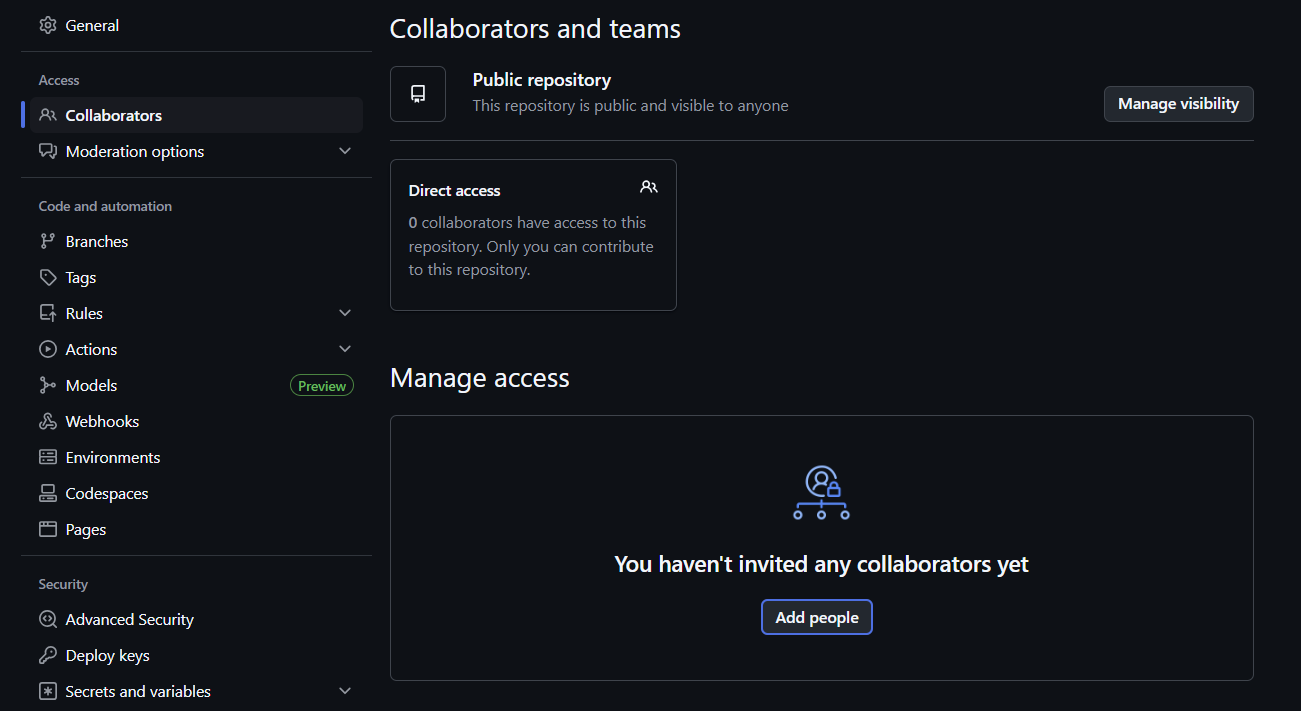
- Click
Add peopleand find your teammates once they have made their own GitHub accounts - Have your teammates accept the invite on their account
What is a Git branch?
In Git, a branch is essentially a separate line of development within your repository. Think of it like a parallel path you can take to work on something without affecting the main line of development.
You can then make changes and commit them to this branch without affecting the original branch.
Oftentimes this original branch is your main or master branch (though main is the recommended and default GitHub name), which is (or should be) your project’s stable version.
To create and switch to a new branch:
git checkout -b <branch name>
To switch to a branch that exists in your remote repository already
git fetchgit checkout <branch name>
What is merging in Git?
Merging in Git is the process of combining changes from one branch into another. When you merge, Git takes the contents of a source branch and integrates them with the target branch.
Merging is typically done using commands like git merge <branch-name> and git pull or through pull requests on platforms like GitHub. After merging, you can delete the source branch if it’s no longer needed, as its changes are now part of the target branch.
Note that git pull updates your local branch with changes from its corresponding remote branch. It runs these two commands under the hood:
git fetch- Downloads all changes from remote repositorygit merge- integrates those fetched changes into your current branch
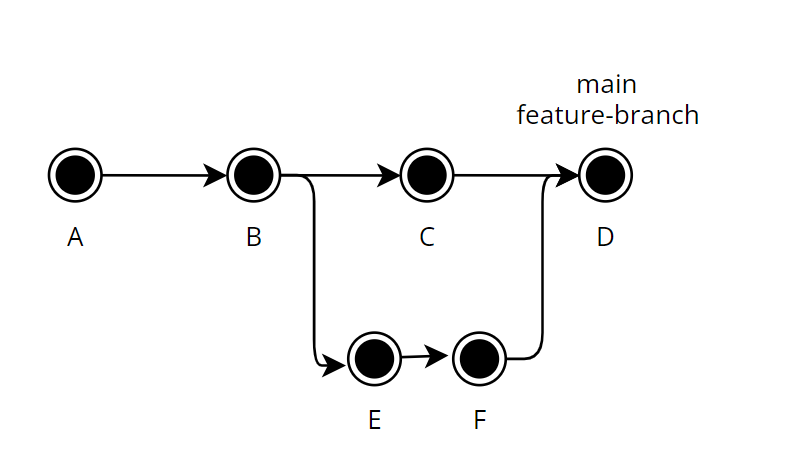
At commit B, a new branch called feature-branch is created. From this branch, two new commits are made: E and F. After completing the work on the feature-branch, the changes are merged back into the main branch, resulting in the final commit D. Both the main and feature-branch labels now point to this commit D, indicating that the branches have been successfully merged and are currently at the same point in the repository’s history.
How to deal with merge conflicts
A merge conflict occurs when you try to merge (i.e. git pull) two branches that have made different changes to the same part of a file. Git can’t automatically figure out which change to keep, so it needs your help to resolve the conflict.
Note that a git pull that triggers a merge conflict may open a terminal text editor like Vim or Nano.
For Vim:
- To save and continue: Press
Esc, type:wq, then pressEnter - To abort: Press
Esc, type:q!, then pressEnter, then rungit merge --abort
For Nano: - To save and continue: Press
Ctrl+O, pressEnter, then pressCtrl+X - To abort: Press
Ctrl+X, pressNif prompted to save, then rungit merge --abort
In the problem file, Git marks the conflicting area with special markers that looks something like this:
   <<<<<<< HEAD
   Your changes
   =======
   Their changes
   >>>>>>> branch-name
It is your job to go into the file and delete all the special markers along with the content you want to discard before commiting the fixed merge.
For example, let’s say we had some snippet of code that had a merge conflict:
int main() {
    Console.println("Hello world!!!");
<<<<<<< HEAD (Current Change)
    Console.println("Jeffrey is cool");
=======
    Console.println("No he is not");
>>>>>>> feature-branch (Incoming Change)
}
You could modify the content accordingly to look something like this:
int main() {
    Console.println("Hello world!!!");
    Console.println("Jeffrey is cool");
}
Once you’ve done that, you can then stage your merge fix changes and commit them (git add . followed by git commit -m "<message>")