Windows Setup
It is highly recommended to follow everything in order!
Install Git
This is a source-control application that is very useful for sharing projects with many files.
- Go to the Git website
- Download the 64-bit installer
- Run the newly downloaded installer and follow the defaults in the installer dialogue
- Open Git Bash and familiarize yourself with how to navigate the bash terminal (How do I do that?)
Create GitHub account
GitHub is a cloud service for saving your Git repositories online. Go to the GitHub website and create an account if you do not have one already.
Fork RobotathonESP32 Repository
Forking a repository creates a copy that you control on your GitHub account. Teams will use our RobotathonESP32 repo as the template.
Note: only one person in each team has to fork the repository and invite their teammates to it on Github. Everybody that wants to code including the person that forks has to clone the repo to their local computer storage!
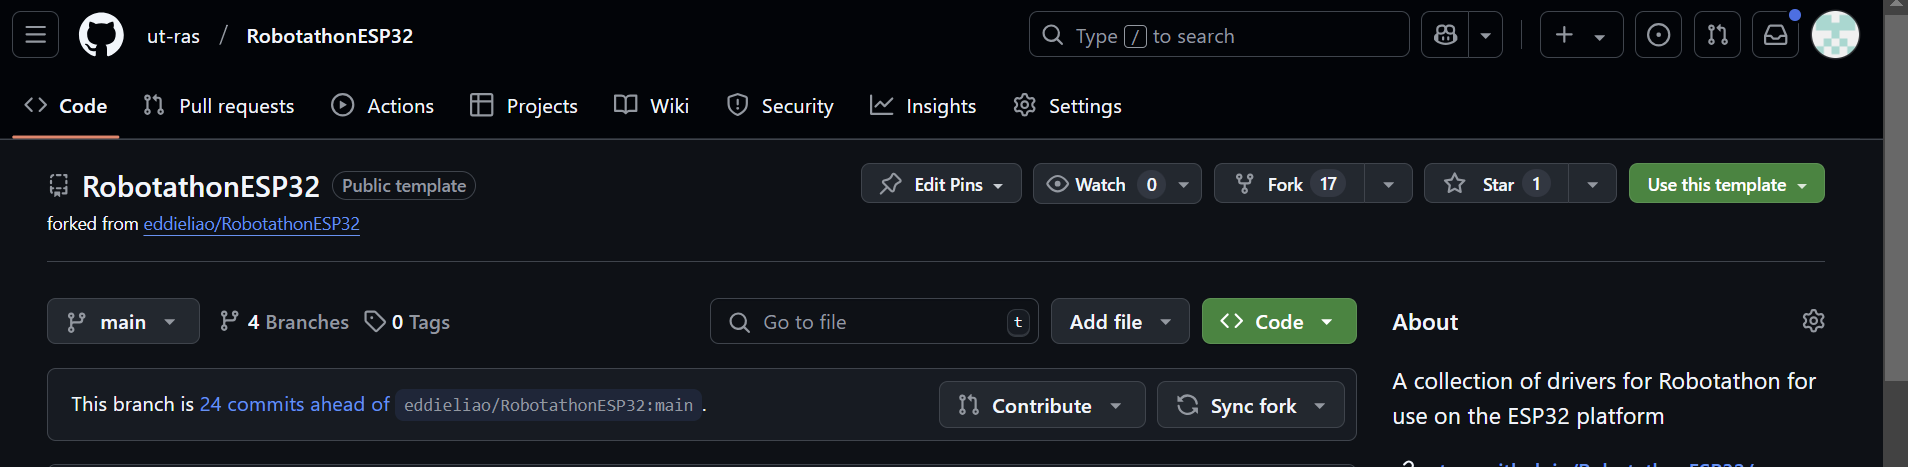
- Go to the ut-ras RobotathonESP32 repository hosted on GitHub
- Click the
Forkbutton on the right
- Keep the repository name as
RobotathonESP32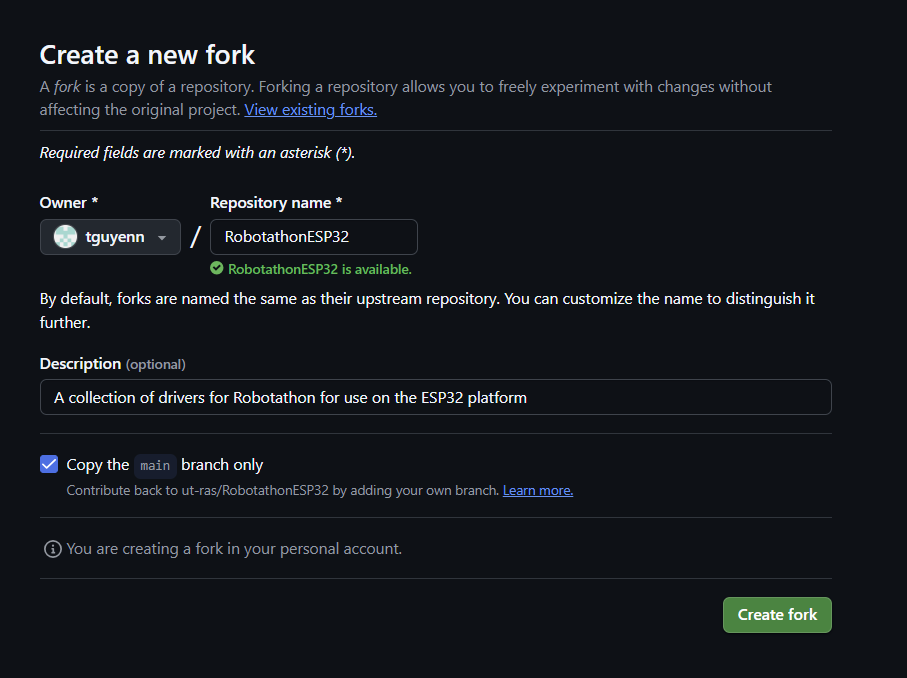
- Click the green
Create forkbutton at the bottom - Share repository access to your teammates by navigating to the settings of your newly forked repository and clicking collaborators in the left menu (How do 6 invite teammates to my forked repository?)
Set Up Git SSH Authentication
This allows for easy and secure interfacing with Git when you want to touch your repositories. The SSH keys are a nice way to authenticate your identity with GitHub.
See the official GitHub tutorial if you want more information. Otherwise just follow these instructions:
Generate SSH key
Git Bash is finicky and doesn’t support Ctrl + V for paste. Use Shift + Insert or Right Click > Paste to paste text.
- Open Git Bash
- Paste
ssh-keygen -t ed25519 -C "your_email@example.com", change the email to the one tied to your Github account (keep the quotes), and pressEnter. - You will be prompted to specify a location to save the SSH key. Press
Enterto specify the default location. - You will likely be prompted to enter a passcode. Press
Entertwice to specify no passcode.
You can add a passcode if you’d like, but it is not recommended. If you do, keep in mind that the Bash terminal does not show your passcode as you type it out. Just continue (accurately) typing and press Enter when done.
Add SSH key to SSH-agent
- Paste
eval "$(ssh-agent -s)"into the terminal and pressEnterto start the SSH-agent - Paste
ssh-add ~/.ssh/id_ed25519into the terminal and pressEnterto add your key to the SSH-agent
Add SSH key to Github
- Paste
cat ~/.ssh/id_ed25519.pubinto the terminal and pressEnterto display your public SSH key - Copy the entire key
The key should look something like ssh-ed25519 SFNJNAFNEJKFNJNJKNFJHFJAHOHiowuroiuwr/sfjeher+KX/rH email@gmail.com
- Navigate to the upper-right corner of any page on GitHub, click your profile photo, then click Settings (gear icon)

- In the
Accesssection of the sidebar, clickSSH and GPG keys - Click the green
New SSH keybutton on the right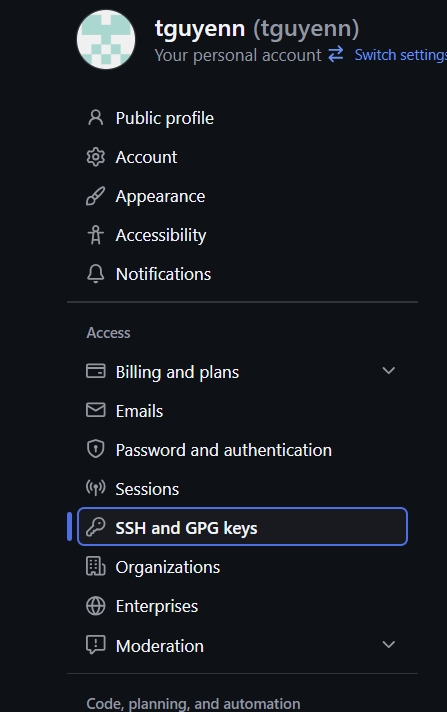
- Put whatever you want for the key title name
- Select the key type to be
Authentication - Paste in the key you copied earlier into the
Keysection - Click
Add SSH Key
Clone Forked Repository
Cloning is the process of copying a Git repository onto your local computer storage. Everyone has to do this to work on code!
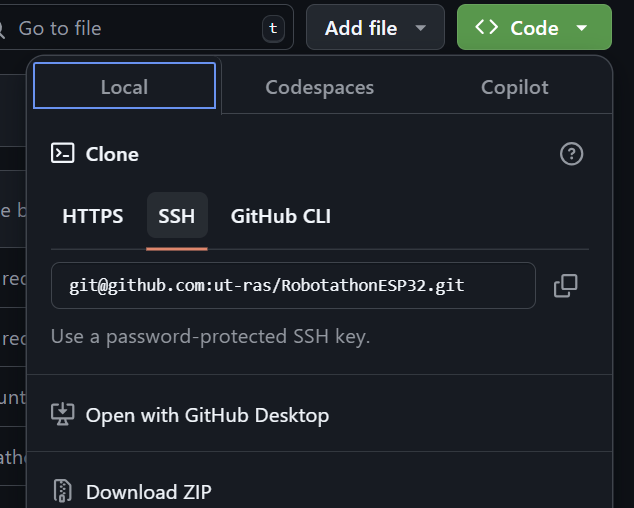
- Go to your team’s newly forked repository
- Click the green
<> Codebutton - If you did the previous section, copy the SSH git link. Otherwise copy the HTTPS link. What is the difference?
- Open Git Bash and navigate to where you want to keep your code for the competition, such as your Documents or Desktop. How do I do that?
- Run the following command in your Git terminal:
git clone [PASTE GIT LINK HERE]without the square brackets - You will likely run into Git having an issue with the authenticity. Simply type
yesand pressEnter
Install USB-UART Bridge Driver
This allows your computer to recognize and program your ESP32 when you plug it in.
- Go to SiLabs installer webpage
- Download the file named
CP210x Windows Drivers - Extract the downloaded zip file and run the appropriate installer application inside (likely x64)
- Agree and use default configuration
Install VS Code and ESP-IDF Extension
VS Code is an easily customizable IDE with many extensions and a large community, meaning you can easiy find solutions to any issues that may arise :)
If your Windows username has spaces in it, then you will need to use the dropdown guide in lieu of the Normal Installation to set up your VS Code! This is because ESP-IDF cannot install properly if the installation path contains spaces, so the following is our workaround :)
🎁 Alternative Installation (Only do if you have spaces in your Windows username)
Preconfigured Installation (Only do if you have spaces in your Windows username)
The preconfigured version allows you to circumvent the issue of not being able to install ESP-IDF if your Windows username has whitespace in it (ESP-IDF refuses to install if that is the case). This is a (in my humble opinion) a better solution than creating an entirely new account on your computer
Install 7-zip
7-zip is a file compression tool that works much faster than your native Windows tools.
- Go to the 7-zip download page
- Install using defaults
- Launch 7-zip
Install Preconfigured VS Code
- Download zip folder from Box (~3.1 GB)
- Unzip the file to your C: drive using 7-zip. (How do I use 7-zip?)
This will take a while if you don’t use 7-zip
- Launch the “containerized” VS Code by running the
Code.exefile in the unzipped folder - In the top menu bar of VS Code, click
File>Open Folder - Use VS Code to open the folder where you cloned the Robotathon repository (“RobotathonESP32” by default)
- Wait for the ESP-IDF extension to initialize
- Build the project by clicking the wrench icon in the bottom ribbon of VS Code (this will take a while the first time)

Normal Installation
- Download and install VS Code
- Open the extensions tab, search
ESP-IDF, and download the extension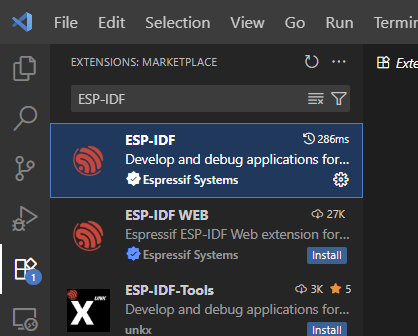
- Open the setup wizard by clicking the
Configure Extensionbutton in the VS Code ESP-IDF welcome page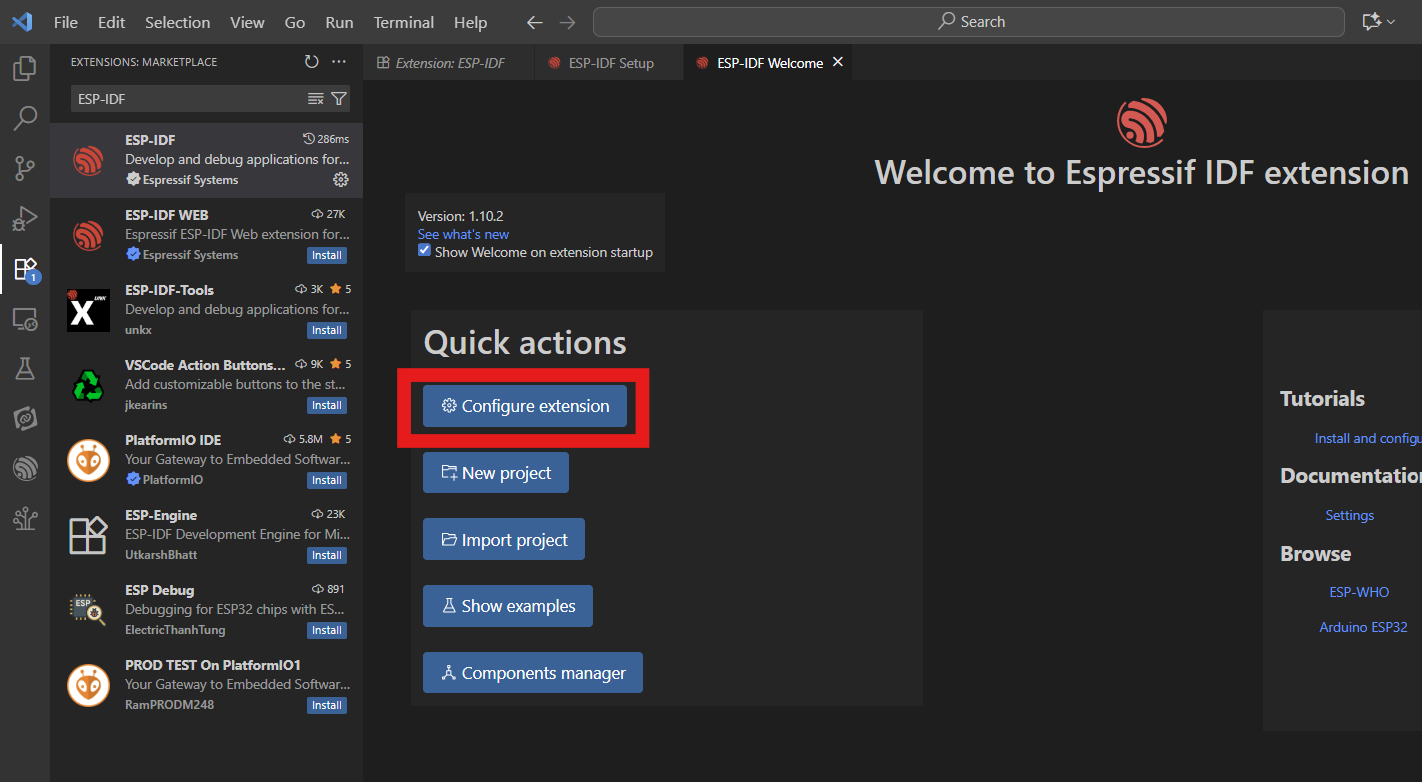
- Click
Express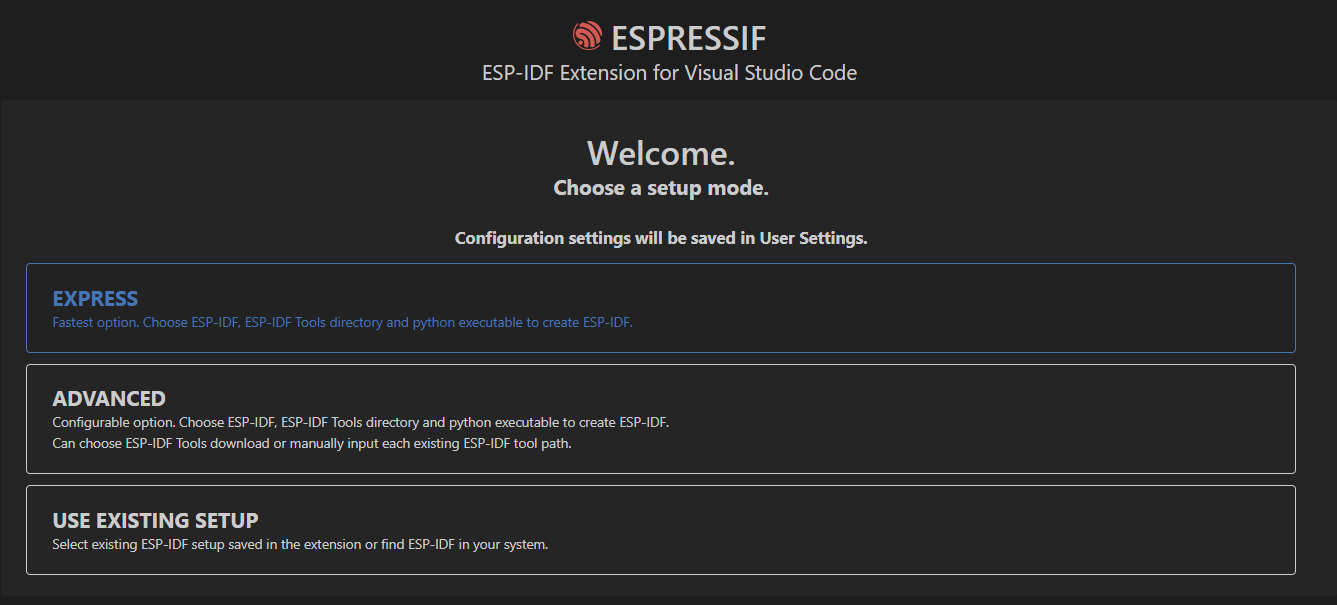
- Check the box saying
Show all ESP-IDF tags
- Select option
v4.4.8 (release version)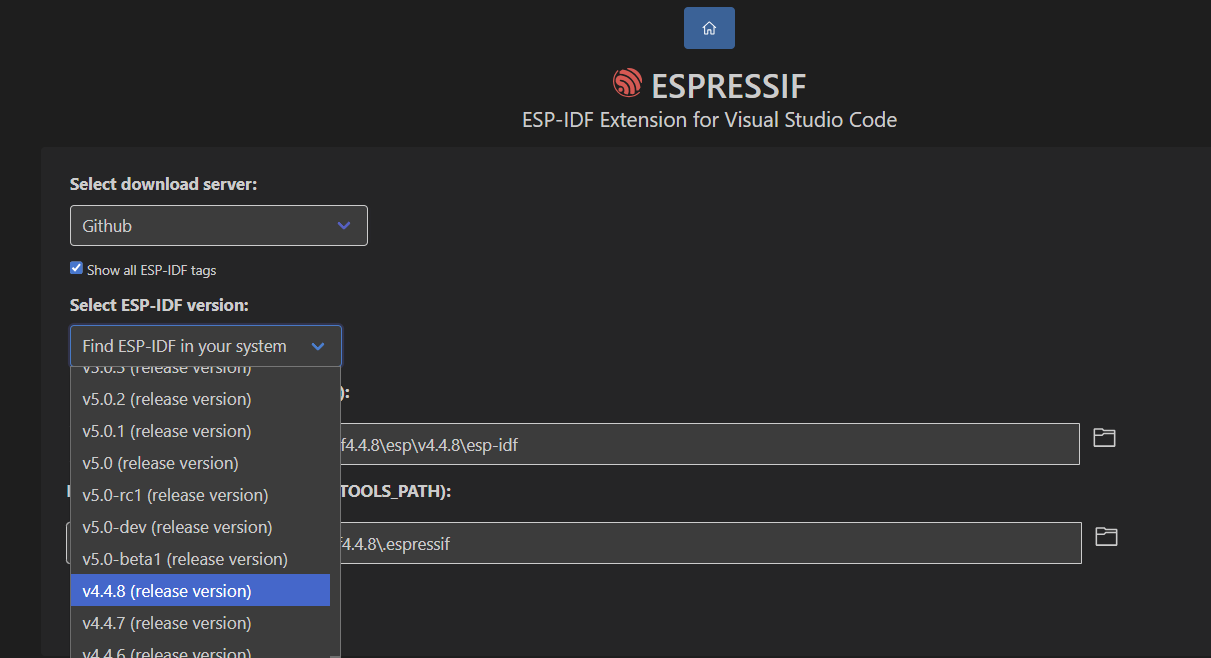
- Ensure the default installation paths are valid (i.e. no red warnings) and click the blue
Installbutton - Wait (this will take a while) :)
- In the top menu bar of VS Code, click
File>Open Folder - Use VS Code to open the folder where you cloned the Robotathon repository (“RobotathonESP32” by default)
- Wait for the ESP-IDF extension to initialize
- Build the project by clicking the wrench icon in the bottom ribbon of VS Code (this will take a while the first time)
Flash your ESP32
- Plug in your ESP32
-
Click the
COMbutton (plug icon) in VS Code’s bottom ribbon menu
-
In the popup dialogue at the top of VS Code, select the COM port labeled
Silicon Labs
-
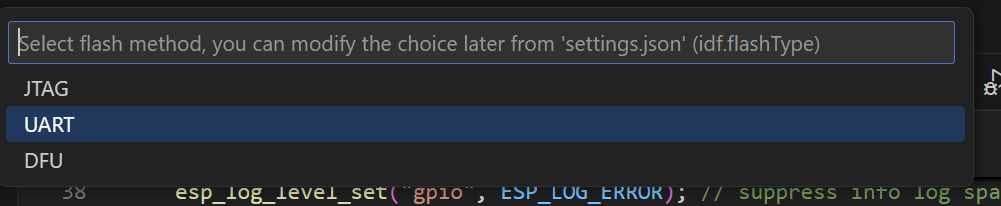
Click the Flash button (lightning button) in the bottom ribbon menu

-
Select UART in the top popup menu
-
Press and hold the flash enable button on your ESP32 (small black button labeled “100”) until the following output shows in your terminal:
- Open the serial monitor (monitor/TV icon)

Building and flashing after the first time does not take nearly as long. In fact, you can press the Build, Flash, and Monitor button (fire icon) to streamline the process!
Example Program
Here is an example program that blinks the onboard LED. “Blinky” projects are a standard “hello world” type of program that demonstrate your development environment works properly.
If you replace your arduino_main.cpp file’s contents with the following, build, and flash properly, then your ESP32’s blue onboard LED will begin to blink every second (yay 😄)!
Note that it is your responsibility to integrate this code with the controller starter code for the environment setup checkpoint!
#include "sdkconfig.h"
#include <Arduino.h>

#define ONBOARD_LED_PIN 2 // defines the word "ONBOARD_LED_PIN" as the number 2 for readability. Note that pin 2 is directly attached to the onboard LED of the microcontroller.

void setup() {
    pinMode(ONBOARD_LED_PIN, OUTPUT); // configures pin 2 to be a GPIO output pin
}

void loop() {
    digitalWrite(ONBOARD_LED_PIN, HIGH); // writes a digital high to pin 2
    delay(1000); // waits for 1000 milliseconds (1 second)
    digitalWrite(ONBOARD_LED_PIN, LOW); // writes a digital low to pin 2
    delay(1000);
}
Tip: Make sure to enable auto-save in your VS Code! It will save you a lot of headaches down the road :)